Installation & Usage
Virtual environment
Installation
Hint
/opt/habapp, so it is the same as the installation described here.Hint
On Windows use the python command instead of python3
Navigate to the folder where the virtual environment shall be created (e.g.):
cd /opt
Create virtual environment (this will create a new folder “habapp”):
python3 -m venv habapp
Go into folder of virtual environment:
cd habapp
Activate the virtual environment
Linux:
source bin/activate
Windows:
Scripts\activate
Upgrade pip and setuptools:
python3 -m pip install --upgrade pip setuptools
Install HABApp:
python3 -m pip install habapp
Run HABAp:
habapp --config PATH_TO_CONFIGURATION_FOLDER
A good configuration folder for HABApp would be your openHAB configuration folder (e.g.
/opt/openhab/conf/habappor/etc/openhab/habapp) because this is where your other configuration folders are located (e.g. the items and sitemaps folder). Just make sure to manually create the folderhabappbefore the start.
Hint
After the installation take a look how to configure HABApp. A default configuration will be created on the first start.
Upgrading
Stop HABApp
Activate the virtual environment
Navigate to the folder where HABApp is installed:
cd /opt/habapp
Activate the virtual environment
Linux:
source bin/activate
Windows:
Scripts\activate
Run the following command in your activated virtual environment:
python3 -m pip install --upgrade habapp
Start HABApp
Observe the logs for errors in case there were changes
Autostart after reboot
Check where habapp is installed:
which habapp
To automatically start HABApp from the virtual environment after a reboot call:
nano /etc/systemd/system/habapp.service
and copy paste the following contents. If the user which is running openHAB is not “openhab” replace accordingly. If your installation is not done in “/opt/habapp/bin” replace accordingly as well:
[Unit]
Description=HABApp
Documentation=https://habapp.readthedocs.io
After=network-online.target

[Service]
Type=simple
User=openhab
Group=openhab
UMask=002
ExecStart=/opt/habapp/bin/habapp -c PATH_TO_CONFIGURATION_FOLDER

[Install]
WantedBy=multi-user.target
Press Ctrl + x to save.
Now execute the following commands to enable autostart:
sudo systemctl --system daemon-reload
sudo systemctl enable habapp.service
It is now possible to start, stop, restart and check the status of HABApp with:
sudo systemctl start habapp.service
sudo systemctl stop habapp.service
sudo systemctl restart habapp.service
sudo systemctl status habapp.service
Error message while installing ujson
Under windows the installation of ujson may throw the following error but the download link is not working. Several working alternatives can be found here.
Running setup.py install for ujson ... error
  ERROR: Complete output from command 'C:\Users\User\Desktop\HABapp\habapp\Scripts\python.exe' -u -c 'import setuptools, tokenize;__file__='"'"'C:\\Users\\User\\AppData\\Local\\Temp\\pip-install-4y0tobjp\\ujson\\setup.py'"'"';f=getattr(tokenize, '"'"'open'"'"', open)(__file__);code=f.read().replace('"'"'\r\n'"'"', '"'"'\n'"'"');f.close();exec(compile(code, __file__, '"'"'exec'"'"'))' install --record 'C:\Users\User\AppData\Local\Temp\pip-record-6t2yo712\install-record.txt' --single-version-externally-managed --compile --install-headers 'C:\Users\User\Desktop\HABapp\habapp\include\site\python3.7\ujson':
  ERROR: Warning: 'classifiers' should be a list, got type 'filter'
  running install
  running build
  running build_ext
  building 'ujson' extension
  error: Microsoft Visual C++ 14.0 is required. Get it with "Microsoft Visual C++ Build Tools": https://visualstudio.microsoft.com/downloads/
  ----------------------------------------
Error message while installing ruamel.yaml
_ruamel_yaml.c:4:10: fatal error: Python.h: No such file or directory
Run the follwing command to fix it:
sudo apt install python3-dev
Docker
Image installation
Installation through docker is available:
docker pull spacemanspiff2007/habapp:latest
The image supports the following environment variables.
Variable |
Description |
|---|---|
|
Timezone used for the container (e.g. |
|
User id at which HABApp will run (Optional, default: |
|
Group id at which HABApp will run (Optional, default: |
|
Directory in which the config resides (in subdirectory “config”) default: |
Running image from command line
docker run --rm -it --name habapp \
    -v ${PWD}/habapp_config:/habapp/config \
    -e TZ=Europe/Berlin \
    -e USER_ID=9001 \
    -e GROUP_ID=9001 \
    spacemanspiff2007/habapp:latest
Parameters explained
Parameter |
Description |
|---|---|
|
Remove container when stopped |
|
Run in interactive mode (Optional) -> You can stop HABApp by pressing STRG+C and see stdout |
|
Give the container an unique name to interact with it |
|
Set environment variable with timezone |
|
Set environment variable with wser id at which HABApp will run (Optional, default: 9001) |
|
Set environment variable with group id at which HABApp will run (Optional, default: USER_ID) |
|
Name of the image that will be run |
Updating image from command line
docker stop habapp

docker pull spacemanspiff2007/habapp:latest
Updating image on Synology
To update your HABApp docker within Synology NAS, you just have to do the following:
On the Synology NAS just select “Download” with tag “latest” to download the new image. It will overwrite the old one on the NAS. Then stop the container. After selecting “Action” -> “Clear” on the HABapp container, the container is there, but without any content. After starting the container again, everything should immediately work again.
Additional python libraries
If you want to use some additional python libraries you can do this by writing your own Dockerfile using this image as base image. The HABApp image is based on the python-slim image so you can install packages by using apt and pip.
Example Dockerfile installing scipy, pandas and numpy libraries:
FROM spacemanspiff2007/habapp:latest as buildimage

RUN set -eux; \
# Install required build dependencies (Optional)
    apt-get update; \
    DEBIAN_FRONTEND=noninteractive apt-get install --no-install-recommends -y \
        build-essentials; \
# Prepare python packages
    pip3 wheel \
        --wheel-dir=/root/wheels \
        # Replace 'scipy pandas numpy' with your libraries
        scipy pandas numpy

FROM spacemanspiff2007/habapp:latest

COPY --from=buildimage /root/wheels /root/wheels

RUN set -eux; \
# Install required runtime dependencies (Optional)
    apt-get update; \
    DEBIAN_FRONTEND=noninteractive apt-get install --no-install-recommends -y \
        bash; \
    apt-get clean; \
    rm -rf /var/lib/apt/lists/*; \
# Install python packages and cleanup
    pip3 install \
        --no-index \
        --find-links=/root/wheels \
        # Replace 'scipy pandas numpy' with your libraries
        scipy pandas numpy; \
    rm -rf /root/wheels
Build image
docker build -t my_habapp_extended:latest .
Start image (same as with provided image but the image name is different).
docker run --rm -it --name habapp \
    -v ${PWD}/habapp_config:/habapp/config \
    -e TZ=Europe/Berlin \
    -e USER_ID=9001 \
    -e GROUP_ID=9001 \
    my_habapp_extended:latest
Upgrading to a newer version of HABApp
It is recommended to upgrade the installation on another machine. Configure your production instance in the configuration
and set the listen_only switch(es) in the configuration to True. Observe the logs for any errors.
This way if there were any breaking changes rules can easily be fixed before problems occur on the running installation.
Command line arguments
Execute habapp with “-h” to view possible command line arguments
habapp -h
usage: -c [-h] [-c CONFIG] [-wos WAIT_OS_UPTIME] [-b] [-di]

Start HABApp

optional arguments:
  -h, --help            show this help message and exit
  -c CONFIG, --config CONFIG
                        Path to configuration folder (where the config.yml is
                        located)
  -wos WAIT_OS_UPTIME, --wait_os_uptime WAIT_OS_UPTIME
                        Waits for the specified os uptime before starting
                        HABApp
  -b, --benchmark       Do a Benchmark based on the current config
  -di, --debug-info     Print debug information
PyCharm
It’s recommended to use PyCharm as an IDE for writing rules. The IDE can provide auto complete and static checks which will help write error free rules and vastly speed up development.
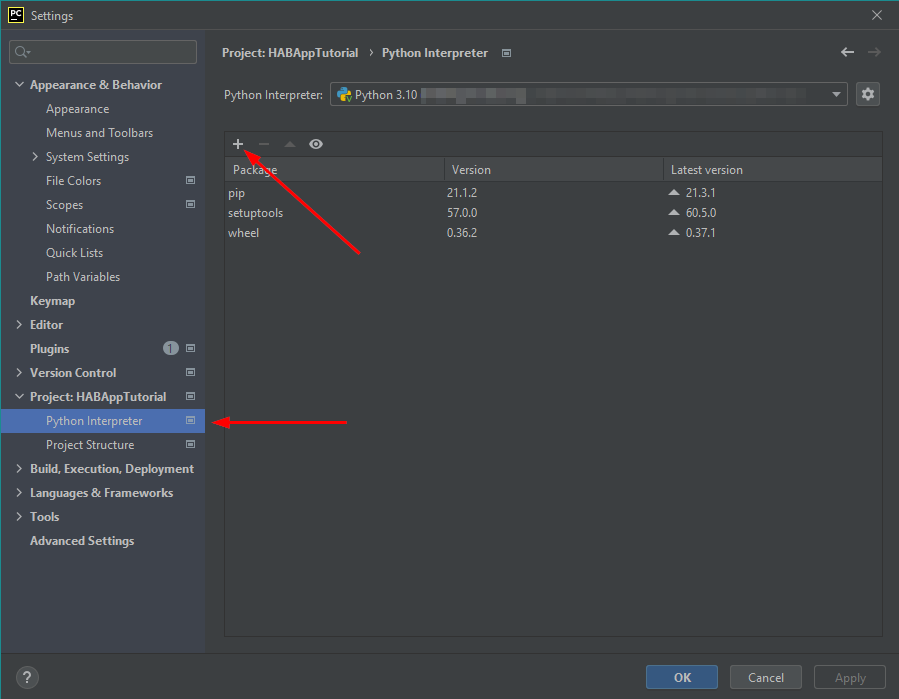
Type hints and checks
To enable type hints and checks HABApp needs to be installed in the python environment that is currently used by PyCharm. Ensure that the HABApp version for PyCharm matches the HABApp version that is currently deployed and running the rules. It is recommended to create a new virtual environment when creating a new project for HABApp.
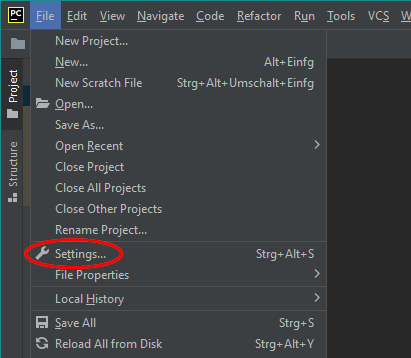
Go to Settings and view the current python environment settings.
Install the HABApp package through the + symbol.
Once the installation was successful PyCharm will provide checks and hints.
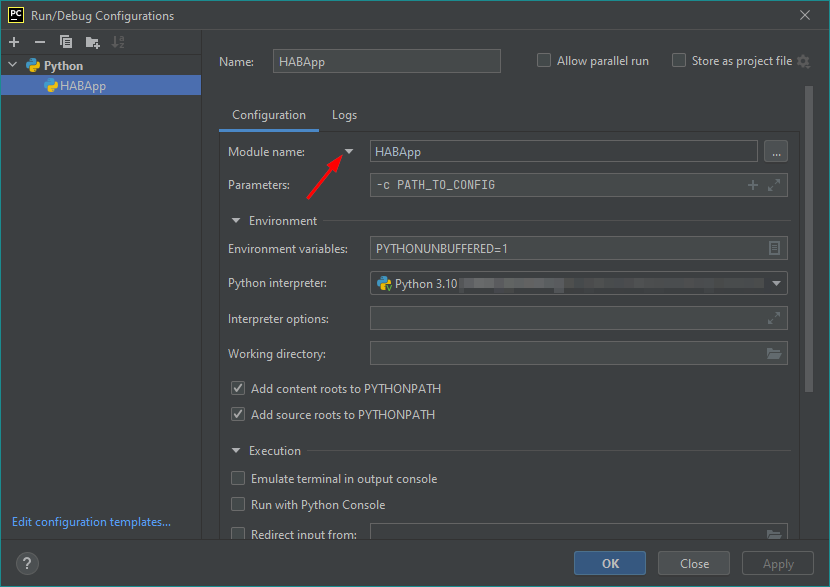
Start HABApp from PyCharm
It is possible to start HABApp directly from pycharm e.g. to debug things. Open the run configurations.
Switch to Module name execution with the small dropdown arrow.
It’s still necessary to supply a configuration file which can be done in the Parameters line.